How to Make a Tilt Shift Miniature Photo
Turn a normal photo into a tilt shift miniature in your browser. Place the sharp band, blur the rest, make the colors stronger, and download it in full size.
3 min read
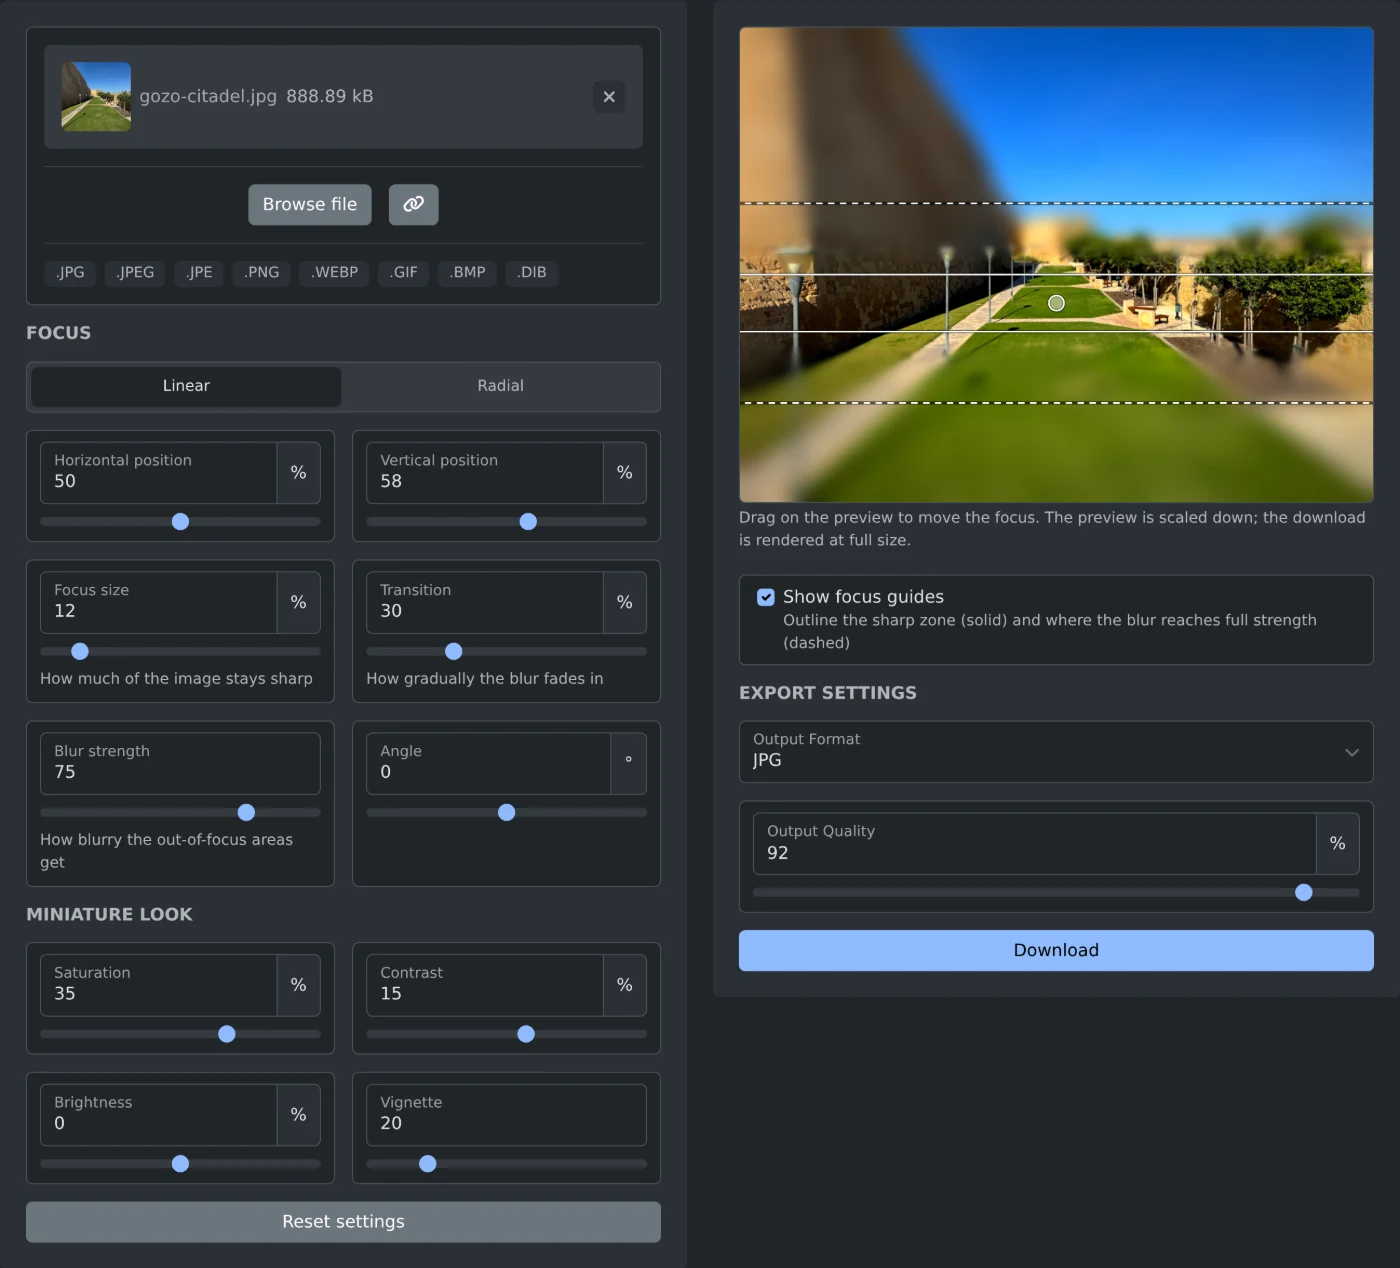
To make a tilt shift photo, open the tilt shift image generator and add your photo. A sharp band appears across it, and the parts above and below the band are blurred. Drag on the preview to move the band onto your subject, then click Download. The photo is processed in your browser and is never uploaded.
The miniature look works best on a photo taken from above, such as a street seen from a roof, a bridge or a hill. People, cars and houses then look like small models.
How to make the miniature photo
- Click "Browse file" or drop the photo on the box. JPG, PNG, WebP, GIF and BMP files work.
- Wait for the preview. The default settings are applied right away, and there is no Apply button.
- Click or drag on the preview to put the sharp band on your subject. The arrow keys move it too.
- Change "Focus size" and "Blur strength" until the effect looks right.
- Click Download.
The file gets -tilt-shift at the end of its name, so gozo-citadel.jpg is saved as gozo-citadel-tilt-shift.jpg.
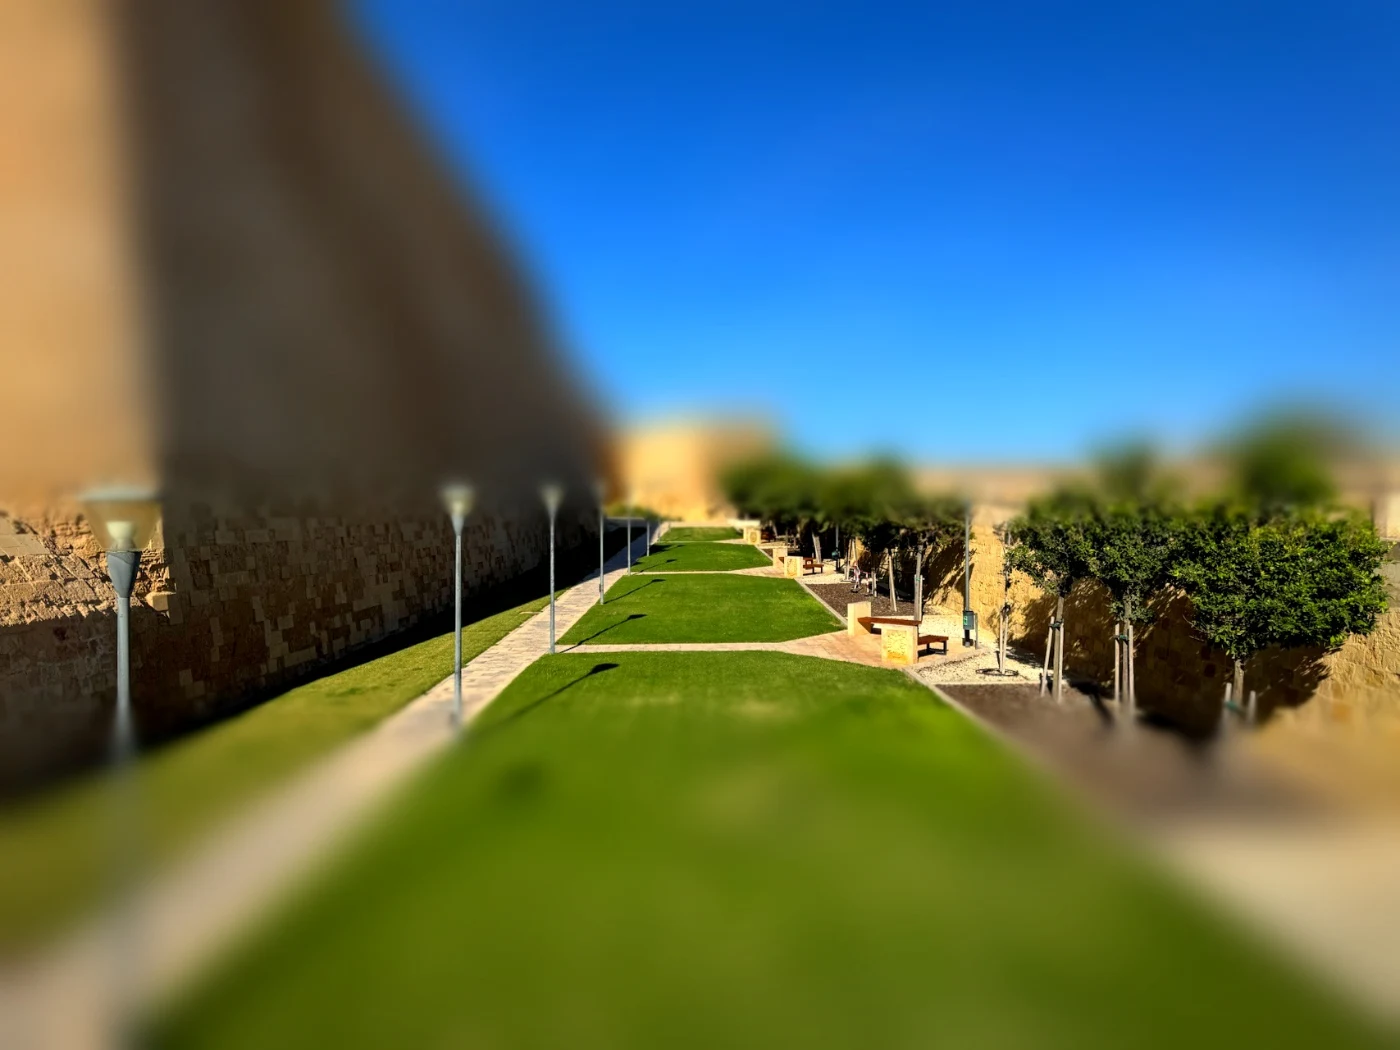 The downloaded photo of the Gozo citadel walls, sharp across the lawn and the benches, with the walls, the sky and the near grass blurred and the colors made stronger
How to place the focus
Under Focus, Linear makes a straight sharp band. Radial makes a round sharp spot, for one building or one group of people.
- "Horizontal position" and "Vertical position" set the center of the band or spot. Dragging on the preview changes them too.
- "Focus size" is how much of the photo stays sharp. A smaller value gives a stronger effect.
- Transition sets how slowly the blur grows next to the sharp zone.
- Angle turns the band, for a road that crosses the photo at a slant. It works with Linear only.
The focus guides on the preview show the sharp zone as solid lines and full blur as dashed lines. They are not part of the download. Untick "Show focus guides" to see the preview without them.
How to change the colors
The sliders under "Miniature look" change the colors of the whole photo. Saturation starts at 35% and Contrast at 15%, so the colors are already stronger than in the original. Vignette darkens the corners and starts at 20. Brightness starts at 0.
Double click a slider to put that setting back to its default. "Reset settings" puts every setting back.
Before you download
- The preview is a smaller copy of the photo. The download has the full size of your original.
- The format is the same as the uploaded photo. A GIF or BMP photo is saved as PNG. Pick JPG, PNG or WebP under "Output Format" to change it.
- "Output Quality" works for JPG and WebP and starts at 92%.
- A large photo takes a moment. The button text changes while the full size file is made.
Put the band on your subject, check the edges of the blur, and download the photo.
Ready to try it yourself?
Tilt-Shift Image Generator
Turn any photo into a tilt-shift miniature. Drag to place a sharp focus band or spot, blur everything around it, boost the colors, and download the full-resolution result. Runs in your browser.