How to Convert Film Negatives to Photos
Turn a scan or phone photo of a film negative into a normal picture, take the blue cast out of color film, and download the positive. Nothing is uploaded.
3 min read
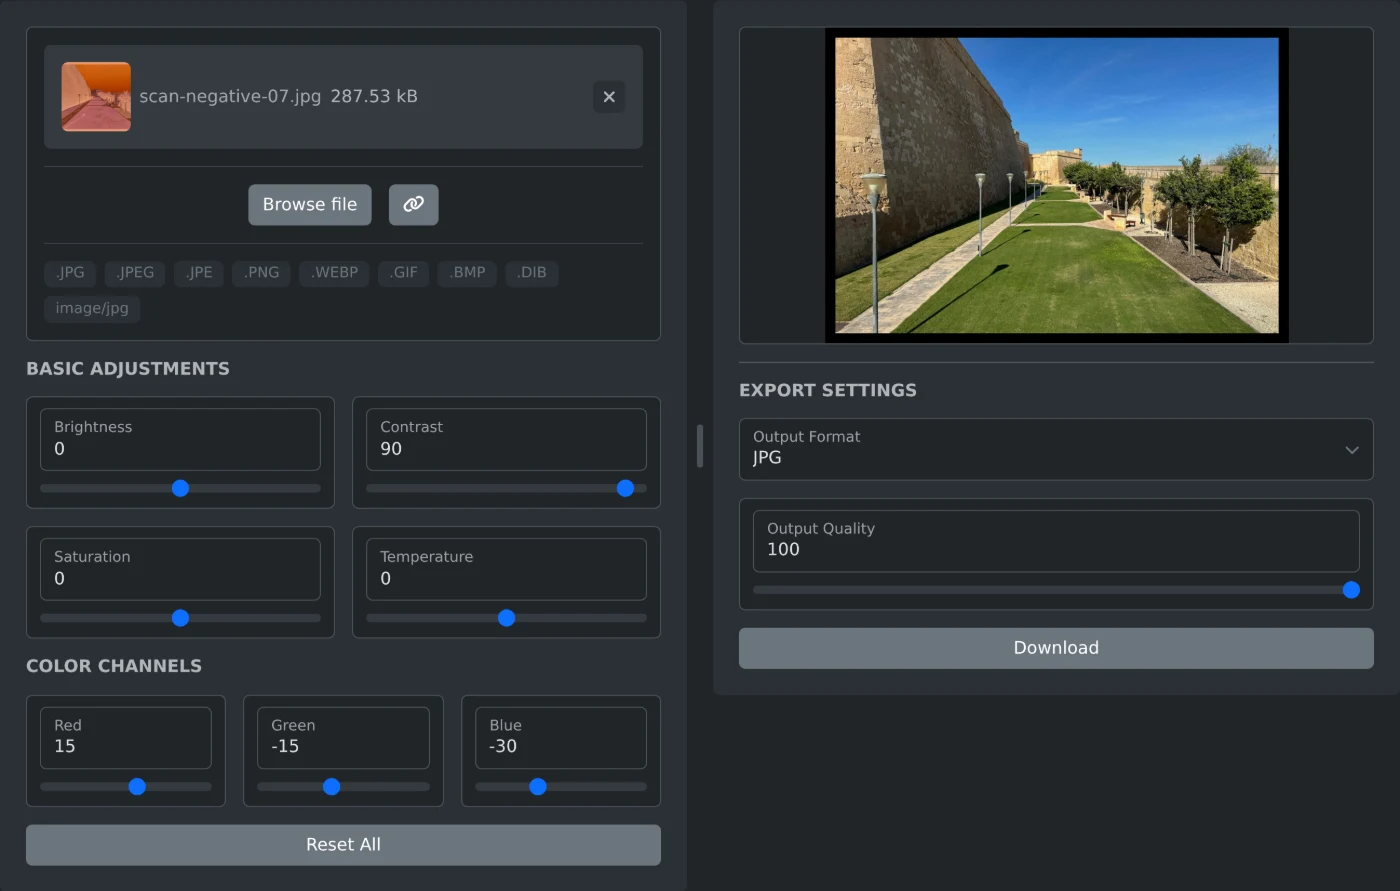
To turn a film negative into a positive photo, open the negative to positive photo converter and add a scan of the negative. A phone photo of it works too. The colors are inverted right away. For color film, move the Red, Green and Blue sliders until the blue cast is gone, raise Contrast, and click Download. The photo is processed in your browser and is never uploaded.
The converter inverts the image and changes nothing else until you move a slider. It has no film type setting and no automatic removal of the orange film base. On a color negative, that orange turns into a strong blue cast, and the photo looks flat. You fix both with the sliders.
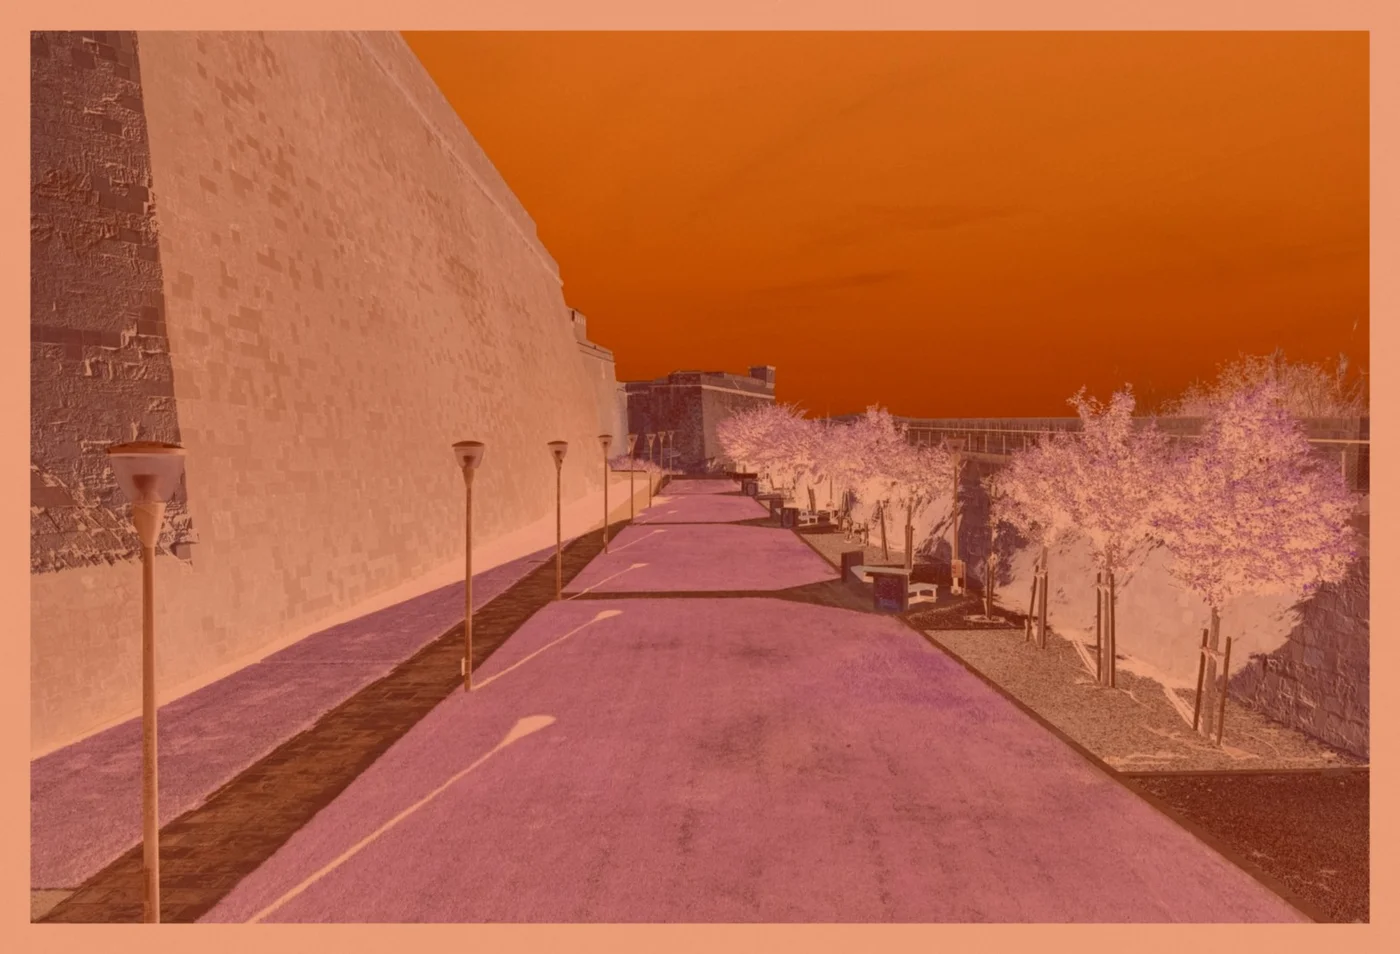 A scan of a color negative with an orange film base, before the conversion
How to convert the negative
- If the scan shows a whole strip, crop it to one frame first. The converter has no crop or rotate setting.
- Click "Browse file" or drop the scan on the box. JPG, PNG, WebP, GIF and BMP files work.
- Check the result on the right. It is the inverted scan with all sliders at 0.
- Fix the colors under "Color Channels", as shown in the next section.
- Move Contrast under "Basic Adjustments" to the right.
- Pick JPG, PNG or WebP under "Output Format" and click Download.
The preview updates a moment after each change. Click it to see the photo full size. The download has -positive added to the file name, for example scan-negative-07-positive.jpg. It has the same width and height as the scan.
How to remove the blue cast from a color negative
The seven adjustment sliders go from -100 to 100 and start at 0. Watch a part of the photo that should be white or gray. Then move the sliders in this order.
- Blue: move it left until the blue tint is gone.
- Red: move it right if the photo still looks cyan.
- Green: move it left if the photo looks green, or right if it looks pink.
- Contrast: move it right until the darkest parts are black and the brightest parts are white.
For the scan in the picture above, Red 15, Green -15, Blue -30 and Contrast 90 gave natural colors. Your scan needs its own values, so start there and adjust by eye. Temperature makes the whole photo warmer to the right and cooler to the left. "Reset All" sets all seven sliders back to 0.
The slider values stay when you choose the next scan. You can use them again for the other frames of the same roll.
How to convert a black and white negative
A black and white negative needs no color fixes. If the scan has a color tint, move Saturation to -100. The photo becomes pure gray. Then set Contrast and Brightness until the tones look right.
Which format to download
JPG is the default. PNG keeps every detail of the result, in a larger file. The Output Quality slider works for JPG and WebP. It goes from 1 to 100 and starts at 100. It is turned off for PNG.
Load the scan, take out the blue, raise the contrast, and download the positive.
Ready to try it yourself?
Negative to Positive Photo Converter
Convert film negatives to positive photos by inverting colors. Transform scanned negative images into normal, viewable photographs instantly.